
 AI-Taxi App
 AI-Food App
 AI-Property Mgmt App
 AI-CRM
 AI-Fantasy App
 Web Development
 App Development
 Business & Startup
 Hire Developer
 Digital Marketing
 Lead-generation
 Creative Agency
 Branding Agency
 Augmented Reality
 Virtual Reality
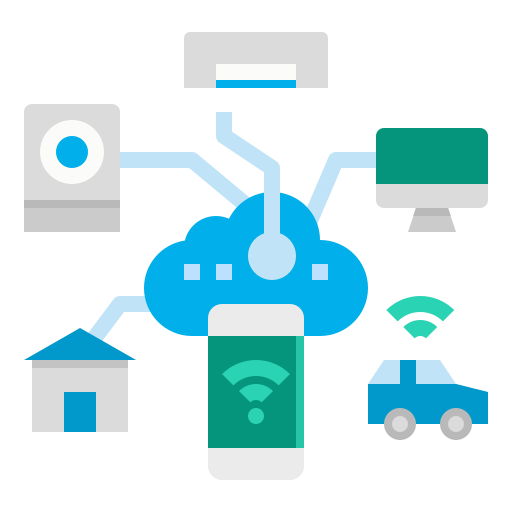 Internet of Things
 Artificial Intelligence
 Blockchain
 Chatbot
Web apps have become essential to our daily lives—powering everything from social media platforms and online marketplaces to productivity tools and online learning solutions. Whether you are an entrepreneur looking to launch a new startup or a developer seeking to build the next big thing, creating a web app is an exciting and rewarding experience.
But where do you start? How do you transform your app idea into a fully functional web app that users will love?
This comprehensive guide will take you through the step-by-step process of creating a web app from scratch. From planning and designing to developing and testing, we’ll cover everything you need to know to create a successful web app that stands out in today’s crowded digital landscape.
We’ll also compare web apps to mobile apps and explain the pros and cons of each, so you can choose the best option for your project.
What is a Web App?
web app, short for web application, is a program or software that runs within your web browser, like Chrome, Firefox, or Safari. Unlike traditional desktop applications that you need to download and install, web apps are accessed directly through the internet.
There are several types of web apps, including static web apps, dynamic web apps, single-page apps (SPAs), and progressive web apps (PWAs).
How to Create a Web App in 10 Steps
Now that we have a clear understanding of what web apps are and their different types, let’s dive into the step-by-step guide for creating a web app from scratch.
- Identify the problem and target audience
- Define the features and requirements
- Sketch out the user interface and user experience
- Choose the right programming language and framework
- Set up the development environment and tools
- Develop the front-end interface and design
- Develop the back-end logic and server-side components
- Test the web app for functionality, performance, and security
- Deploy the web app to a hosting service and configure the server and database
- Launch the web app and monitor user feedback and engagement
Step 1 – Identify the problem and target audience
Problem Identification
Look around: Observe your own life and the lives of those around you. What are common frustrations or inconveniences people face? Are there tasks that could be made easier or more efficient?
Market research: Explore existing solutions and identify gaps or limitations. Can you improve on existing solutions or offer something entirely new?
Trend analysis: Stay updated on current trends and technological advancements. Can you leverage these trends to solve a problem in a novel way?
Target Audience
Be specific: Don't try to cater to everyone. Define a specific demographic or group of people with shared needs and challenges.
Understand their demographics: Consider factors like age, gender, location, income, and occupation to tailor your app's features and language to resonate with them.
Research their online behavior: Understand where your target audience spends their time online, what platforms they use, and what kind of content they consume. This helps you choose the right channels to reach them.
Connecting the dots
Once you have a clear understanding of the problem and the target audience, ask yourself how your app will bridge the gap. How will it address their pain points and make their lives easier or better?
Focus on value proposition: Clearly articulate the benefits and unique value your app offers. What makes it stand out from other solutions?
Prototype and test: Don't be afraid to iterate and refine your concept based on user feedback. Even before you start coding, create mockups or prototypes to test your ideas with potential users and gather valuable insights.
Step 2 – Define the features and requirements
Features
Prioritization: Use frameworks like the MoSCoW method (Must-have, Should-have, Could-have, Won't-have) to prioritize features based on their necessity and impact.
User-centricity: Focus on features that solve your target audience's problems and address their pain points. User research and feedback are invaluable for this.
Minimum Viable Product (MVP): Start with a core set of essential features that form the MVP and release it early to gather user feedback and iterate quickly.
Competitive analysis: Research existing solutions in your target market and identify features they lack or do poorly. Use this to differentiate your app and offer a better user experience.
Requirements
Performance: Define benchmarks for loading times, response rates, and resource usage to ensure a smooth user experience.
Security: Implement robust security measures like user authentication, data encryption, and vulnerability scanning to protect user data.
Scalability: Ensure your app can handle increasing user traffic and data volume without performance degradation. Consider cloud-based infrastructure for flexibility.
Compatibility: Make sure your app works seamlessly across different devices, browsers, and operating systems.
Additional Tips
Document everything: Clearly document your feature list and requirements to ensure everyone involved in the development process is on the same page.
Use tools and templates: Several online tools and templates can help you manage your features and requirements efficiently.
Be flexible: As you develop your app, be open to adapting your features and requirements based on new insights and user feedback.
Step 3 – Sketch out the user interface and user experience
Now it’s time to sketch out the user interface (UI) and user experience (UX) design. This involves creating wireframes and mockups of the app’s layout, navigation, and visual elements. You’ll also need to test these visual elements with potential users to gather feedback and improve the design.
The first thing you need to do is identify the key screens and workflows of your app. Then sketch out their layout and navigation.
Consider the user flow and how users will interact with the app to achieve their goals. Use tools like Sketch, Figma, or Adobe XD to create high-fidelity mockups of the screens and add visual elements such as icons, images, and typography to enhance the design.
Once you’ve created the wireframes and mockups, test them with potential users and gather feedback on the design, usability, and functionality. Use this feedback to iterate and improve the design to ensure that it aligns with the needs and expectations of your target audience.
Sketching out the user interface and user experience helps set the foundation for the app’s design and usability. So don’t rush through this step.
Step 4 – Choose the right programming language and framework
This decision depends on several factors. You must consider the app’s complexity, scalability requirements, and availability of developers with the required skills.
Some popular programming languages for web development include JavaScript, Python, PHP, Ruby, and Java. JavaScript is a versatile language that runs on both the client and server side, and is used for building modern web applications such as SPAs and PWAs. Python is usually a good choice for web development due to its simplicity, readability, and its vast library of frameworks and tools.
PHP’s server-side language powers popular platforms such as WordPress and Facebook. Ruby is known for its elegant syntax and the popular web development framework Ruby on Rails. Java is another robust language that’s commonly used for building large-scale web applications.
In addition to the programming language, you also need to choose a web development framework that provides a set of tools and libraries for building web applications. Some popular frameworks include React, Angular, Vue, Django, Laravel, and Ruby on Rails.
Step 5 – Set up the development environment and tools

To build a successful web app, you need to set up the development environment and tools correctly. This means installing the necessary software and tools to build, test, and deploy your web app.
Start by selecting a code editor that suits your needs. Examples include Visual Studio Code, Sublime Text, or Atom. These editors offer features like syntax highlighting, code completion, and debugging, which help to speed up the development process.
Step 6 – Develop the front-end interface and design
This step involves creating the visual elements, layout, and interactivity of your app’s user interface (UI) using HTML, CSS, and JavaScript.
Start by using the wireframes and mockups that you created in Step 3 as a reference for the app’s design. Use HTML to create the structure of the web pages, CSS to style the elements and layout, and JavaScript to add interactivity and dynamic behavior.
Consider using a front-end framework such as React, Angular, or Vue, which provides a set of pre-built UI components and tools that speed up the development process. These frameworks also offer features like state management, routing, and testing, which help to improve the app’s performance and user experience.
Make sure to test the front-end interface and design thoroughly. Then gather feedback from potential users to identify areas for improvement.
Step 7 – Develop the back-end logic and server-side components
Now that you’ve created the front-end interface and design, it’s time to focus on the back-end logic and server-side components.
This part of the development process involves creating the code and infrastructure that handles the app’s business logic, data storage, and communication with the front end.
To begin, you’ll first need to choose a server-side language and framework that suits your app’s requirements and features. Popular options include Node.js with Express, Ruby on Rails, Django, and Flask. Using the chosen language and framework, you can create the back-end code and implement the app’s business logic, database connections, and API endpoints.
Additionally, you may want to consider using a database management system (DBMS) to store and manage the app’s data. Some common DBMS options include MySQL, PostgreSQL, MongoDB, and Firebase. The choice of DBMS will depend on factors such as scalability, performance, and data consistency.
Step 8 – Test the web app for functionality, performance, and security
Before you deploy and host your web app, you need to test it to make sure it’s working correctly and securely. This involves checking the functionality of the app’s features, testing its performance, and ensuring that it’s protected against security threats.
Start by testing the app’s functionality by checking that all its features work as intended. Test all of your buttons, links, and other interactive elements to make sure they perform the expected action. Make sure to test the app on different devices and browsers to ensure that it works consistently across different platforms.
Next, test the app’s performance by measuring its speed and responsiveness. Use tools such as Google PageSpeed Insights or GTmetrix to identify areas for improvement. You may need to optimize images, reduce file sizes, or minify code. This helps to ensure that the app loads quickly and provides a smooth user experience.
Finally, test the app’s security by identifying potential vulnerabilities and threats. Tools like OWASP ZAP or Nmap to scan the app for vulnerabilities such as cross-site scripting, SQL injection, or insecure authentication. Make sure to fix any issues that are identified to ensure that your app is secure and protected against potential attacks.
By testing your web app for functionality, performance, and security, you can identify and address any issues before deploying and hosting it.
Step 9 – Deploy the web app to a hosting service and configure the server and database
Now that your web app is built, you need to put it on the internet so that people can use it. This is the deployment and hosting phase of the process.
To deploy and host your web app, you need to choose a company that provides servers – computers that store your web app and make it available on the internet. Some popular options are AWS, Google Cloud, and Heroku.
Once you’ve chosen a server provider, you’ll need to upload your web app’s files to their servers. This can be done using tools like Docker and Ansible that help simplify the process.
After uploading your web app, you’ll need to make it available on the internet by registering a domain name (like www.yourapp.com) and configuring your server settings so that your app is accessible to anyone who visits your domain. This can be done through a process called DNS configuration.
Once your web app is deployed and hosted, you can make improvements to the app’s performance by monitoring how it performs and making necessary adjustments.
Step 10 – Monitor user feedback and engagement for improvements
Now that your web app is live, it’s important to gather feedback from users and monitor their engagement with the app. This helps you identify areas for improvement and make data-driven decisions that enhance the app’s user experience.
Start by setting up analytics tools such as Google Analytics. These provide data on user behavior and demographics, including the number of visitors, page views, and session duration. Use this data to identify areas where users are dropping off or spending less time. Then make changes to improve those areas.
Additionally, encourage users to provide feedback through surveys, user testing, or social media. This feedback can help you identify issues that you may not have been aware of, as well as new features that users would like to see.
Make sure to prioritize user feedback and engagement in your development process, and continuously make improvements to the app based on the data and feedback you receive. This ensures that your app stays relevant and valuable to your users.
For more information contact : support@mindnotix.com
Mindnotix Software Development Company


